Mama’s “Tater Chip” Chicken

When I was growing up, this was one of my Mama’s go-to recipes for week night dinners, and now that I have my own kitchen, I can see why! It’s so fast, easy, and delicious! The prep time is only about 10 minutes, and the chicken only has to bake for 25 minutes, so it’s perfect if you’re tying to hurry and get dinner on the table.

Ingredients:

  • 1 bag of sour cream and onion potato chips
  • mayonnaise
  • boneless, skinless chicken tenderloins (how ever many you’d like)

Note: You don’t have to use sour cream and onion chips. This recipe is also great with Ranch Doritos chips, or really anything flavorful.

Directions:

  • First, preheat your oven to 350 degrees.
  • Next, line a cookie sheet with tin foil (which makes for super easy clean up).
  • Put the sour cream and onion potato chips in a gallon size ziploc bag and pound with your fist until they are completely crushed.
  • Spoon some mayonnaise onto a plate and drag your thawed chicken through it.
  • Next, one at a time, drop the mayonnaise coated chicken into the ziploc bag and shake until they are completely covered in crushed potato chips.
  • Your pan should look something like this when you’re putting it in the oven:IMG_3277
  • Bake at 350 for 25 minutes and your chicken should be a delicious golden brown. The flavors of the potato chips seep down into the chicken and the mayonnaise makes it so tender and juicy. YUM! Seriously, this will be your new favorite chicken dish. Try it!

IMG_3279

Weekend Recap

Whew! Another fun-filled, jam-packed weekend has passed (too quickly, as always). Late summer is one of my favorite times of year because it just brings back so many treasured memories for me. This weekend, we had a blast hiking on the Blue Ridge Parkway. We love any chance we get to show friends around Boone, N.C.

On Saturday morning, we packed a picnic, headed out early, and hiked up to a few of our favorite spots.

11885381_10207418659450328_6609966888880401247_n 11947529_10207418650970116_5427226483510328774_n 11951379_10207418659770336_5619635715120340715_n

Then, on Sunday, we had our family reunion. On the 4th Sunday of every August, my family gathers together at my great uncle’s house in the mountains on a Christmas tree farm surrounded by beauty and fragrant trees. It’s not a big fancy house, but it’s filled with so much love and the potluck lunch is always good old southern favorites like creamed corn, biscuits, and chicken and dumplins. This year was our first year without my grandma, the oldest of the 5 sisters, and we missed her laughter and contagious spirit, because without her it just feels like we aren’t complete but I’m so thankful for the love of tradition she instilled in me, for my family who still makes days like this happen, and for the chance to all be together.

IMG_3178IMG_3156  IMG_3216

Hope ya’ll had a great weekend, too!

Tervis Guarantee Replacement Review

IMG_3041

I love pretty cups. I don’t know why, but I seem to always find a reason to buy new ones, no matter how hard it gets to find cabinet space for them. Tervis tumblers are some of my favorite cups to drink coffee out of on the go, and I take one with me every day on my way to work. Unfortunately, when you drink tea or coffee out of a clear cup like this, a film develops over time and makes your cup look grimy, no matter how much or how often you clean it.

That’s where my review of Tervis’ Guarantee Replacement comes in. I was a little skeptical of it at first, but I received my new cup in the mail today and couldn’t be happier with the process. I called their customer service number before submitting my request for replacement, just to make sure my cup’s “damage” qualified for replacement, which it did. The process is so easy!

If your cup has a grungy film like mine did (I wish I had a picture, but I don’t), it’s cracked, the seal is not functioning properly, it’s been distorted by heat, or the design malfunctions, you can have your Tervis tumbler replaced for free! All you have to pay for is the postage fee to return it to their warehouse.

If you fill out the Guarantee Replacement Form online, print it out, and send it with your damaged cup, you’ll have a brand new one in your hands in about 3-4 weeks.  You can send it in a bubble envelope, and it only cost me about $3 to mail.

Because the cup I returned was part of the Fiesta Tervis collection, I had to choose the design I wanted as my replacement cup from one of the Fiesta options, but there were new designs available since I got my cup four years ago, and I loved being able to choose a new, more updated design.

What a great thing! The more you know…

Happy Friday!

Please note: This is not a sponsored post, I just wanted to share because it was such a positive experience and I love the company for both their quality and service.

Puppy Love

Everyone, meet Sam.

I had wanted a dog- and not just any dog, but a golden retriever – for my entire life. This little guy just turned six years old, and he’s been mine for a little over a year now. I adopted him from friends of ours, a couple at my church that was moving to Southeastern Baptist Theological Seminary. When they asked me if I’d be willing to take him, I didn’t even hesitate before saying YES. The night they brought him to me, I was so excited I didn’t even know what to do with myself. I didn’t want to startle him by meeting him at the door squealing (which is exactly what I felt like doing), and I knew it would be a new, strange place, so I left the door unlocked and told them to come on in. When they came in the door, the sweetest thing I could have ever hoped for happened. He looked around, walked around the living room, and then came right over to the couch where I was sitting, laid his head down in my lap, and looked up at me like, “hey Mom!”

That’s the instant he stole my heart. To some people, I know it sounds silly, but this little guy has brought so much joy and healing to my heart. He is the sweetest dog I’ve ever met, and would sit on my lap all day long if I let him (which I would if I could). He follows me around the house, watches every move I make, and is always so excited to see me at the end of a long, hard day.

I got my love for animals from my grandma. I can remember standing in her kitchen, helping her make peanut butter sandwiches for the squirrels in her backyard, making homemade humming bird food for her hanging feeders on her wrap around porch, and staring into the pool of Otters at Grandfather Mountain for what seemed like forever, because she and I could have watched them all day. She did get to briefly meet Sam when she was very sick, but I know if she was still here today, she would love him just as much as I do.

IMG_3032

Eyes on the Prize

How do we, as Christians, decipher the difference between

Satan trying to keep us from something because he knows there is great potential for us to be blessed or used by God

and

God protecting us or asking us to wait for His best?


This is a question that I think every Christian faces at some point in their life, if not all the time (like me). Now, I’m in no way claiming that I have this all figured out, because I definitely do not, but I have learned a lot lately and today, I want to share my heart on the matter with you.

There is a very special place in my heart for Haiti. I had wanted to go for a long time before God opened the door for me to go for the first time in 2012. My first trip was overwhelming and eye-opening, but it was really my second trip that changed my life. Instead of going with no idea what to expect and spending the majority of the time “breaking down walls,” or what you might call getting to know the people, I arrived in Jacmel for the second time to friends, having earned their trust, and knowing (pretty much) what my time there would be like.

This December is my next trip to Haiti, and although I can hardly wait to be back on Haitian soil, it has been a very rocky emotional roller coaster leading up to it to say the least. I feel called to go, no question. I want to go, no question. But, somewhere, deep within my heart, I’ve kind of thought in the back of my mind for several months that I wasn’t actually going to go. I’ve thought that something isn’t quite right. I’ve focused on reasons why I shouldn’t go.

But here’s the key (and this was only revealed to me after prayer and seeking lots of Godly council)- if God is the one speaking to you, warning you, protecting you – He is most likely not going to do it through dissension and hurt feelings. I was allowing unforgiveness, frustration with lack of leadership, and sensitivity to distract me from the whole reason I’m going to Haiti in the first place (which is for Jesus). Instead of remembering that if God calls me, He will equip me, I was too busy thinking about what so-and-so did that made me mad, or how so-and-so left me out, or what so-and-so said that hurt my feelings. None of that matters. All that matters is my obedience to God, and that means tunnel vision. Not looking to the right, not looking to the left, but simply focused on the task God has set before me. Obedience to God is a prize.

It’s so clear to me now, that this lack of confidence and abundance of doubt came straight from Satan. John 10:10 says that “the thief comes to steal, kill, and destroy” and that’s exactly what he was trying to do to me. He was trying to steal my passion for missions, he was trying to kill my joy, and he was trying to destroy my desire to obey the call God has placed on my life. He filled me with such a feeling of unworthiness and lack of zeal for the adventure of service set before me. That’s not God. Jesus calls us to live an abundant life, and He loves us too much for this kind of confusion and hurt to ever come from Him.

I hope that if you are going through a similar struggle, this short little glimpse into what God’s laid on my heart has helped you and reminded you of His abounding love for us. You’re loved more than you’ll ever know by Someone who died to know you. Keep your eyes on the prize.

No-Bake Peanut Butter Pie

My husband’s favorite dessert of all time is peanut butter pie, so it was only fitting that I find a recipe early on in our marriage that he loves so I can make it for him through the years. I hope I’m making this same pie for him when we’re in our 80’s, partly because I think he’s the dreamiest, and partly because this pie is just that good.


Ingredients:

  • 1 graham cracker crust (you could make your own, but I didn’t)
  • 1 (8 oz) block of cream cheese (at room temperature)
  • 1/2 cup powdered sugar
  • 1 cup (creamy) peanut butter
  • 1 teaspoon vanilla
  • 8 oz frozen whipped topping
  • Chopped Reese’s cups (I used about 6) for topping 

Directions:

  • First, make sure that your cream cheese is at room temperature. This is very important to avoid lumps.
  • Next, using your mixer, combine the cream cheese and powdered sugar until well blended.
  • Add the peanut butter and vanilla to the mixer until all 4 ingredients are well blended.

  • Then, remove the bowl from the mixer and gently fold in the whipped topping, being careful not to deflate it too much, but still making sure it is well incorporated into the mixture.

  • Using a spoon or rubber spatula, transfer the fluffy mixture into the pie crust and top with chopped Reese’s cups.
  • Freeze for one hour, then refrigerate until just before serving.

IMG_2993

Inside my Traveler’s Notebook

IMG_2954

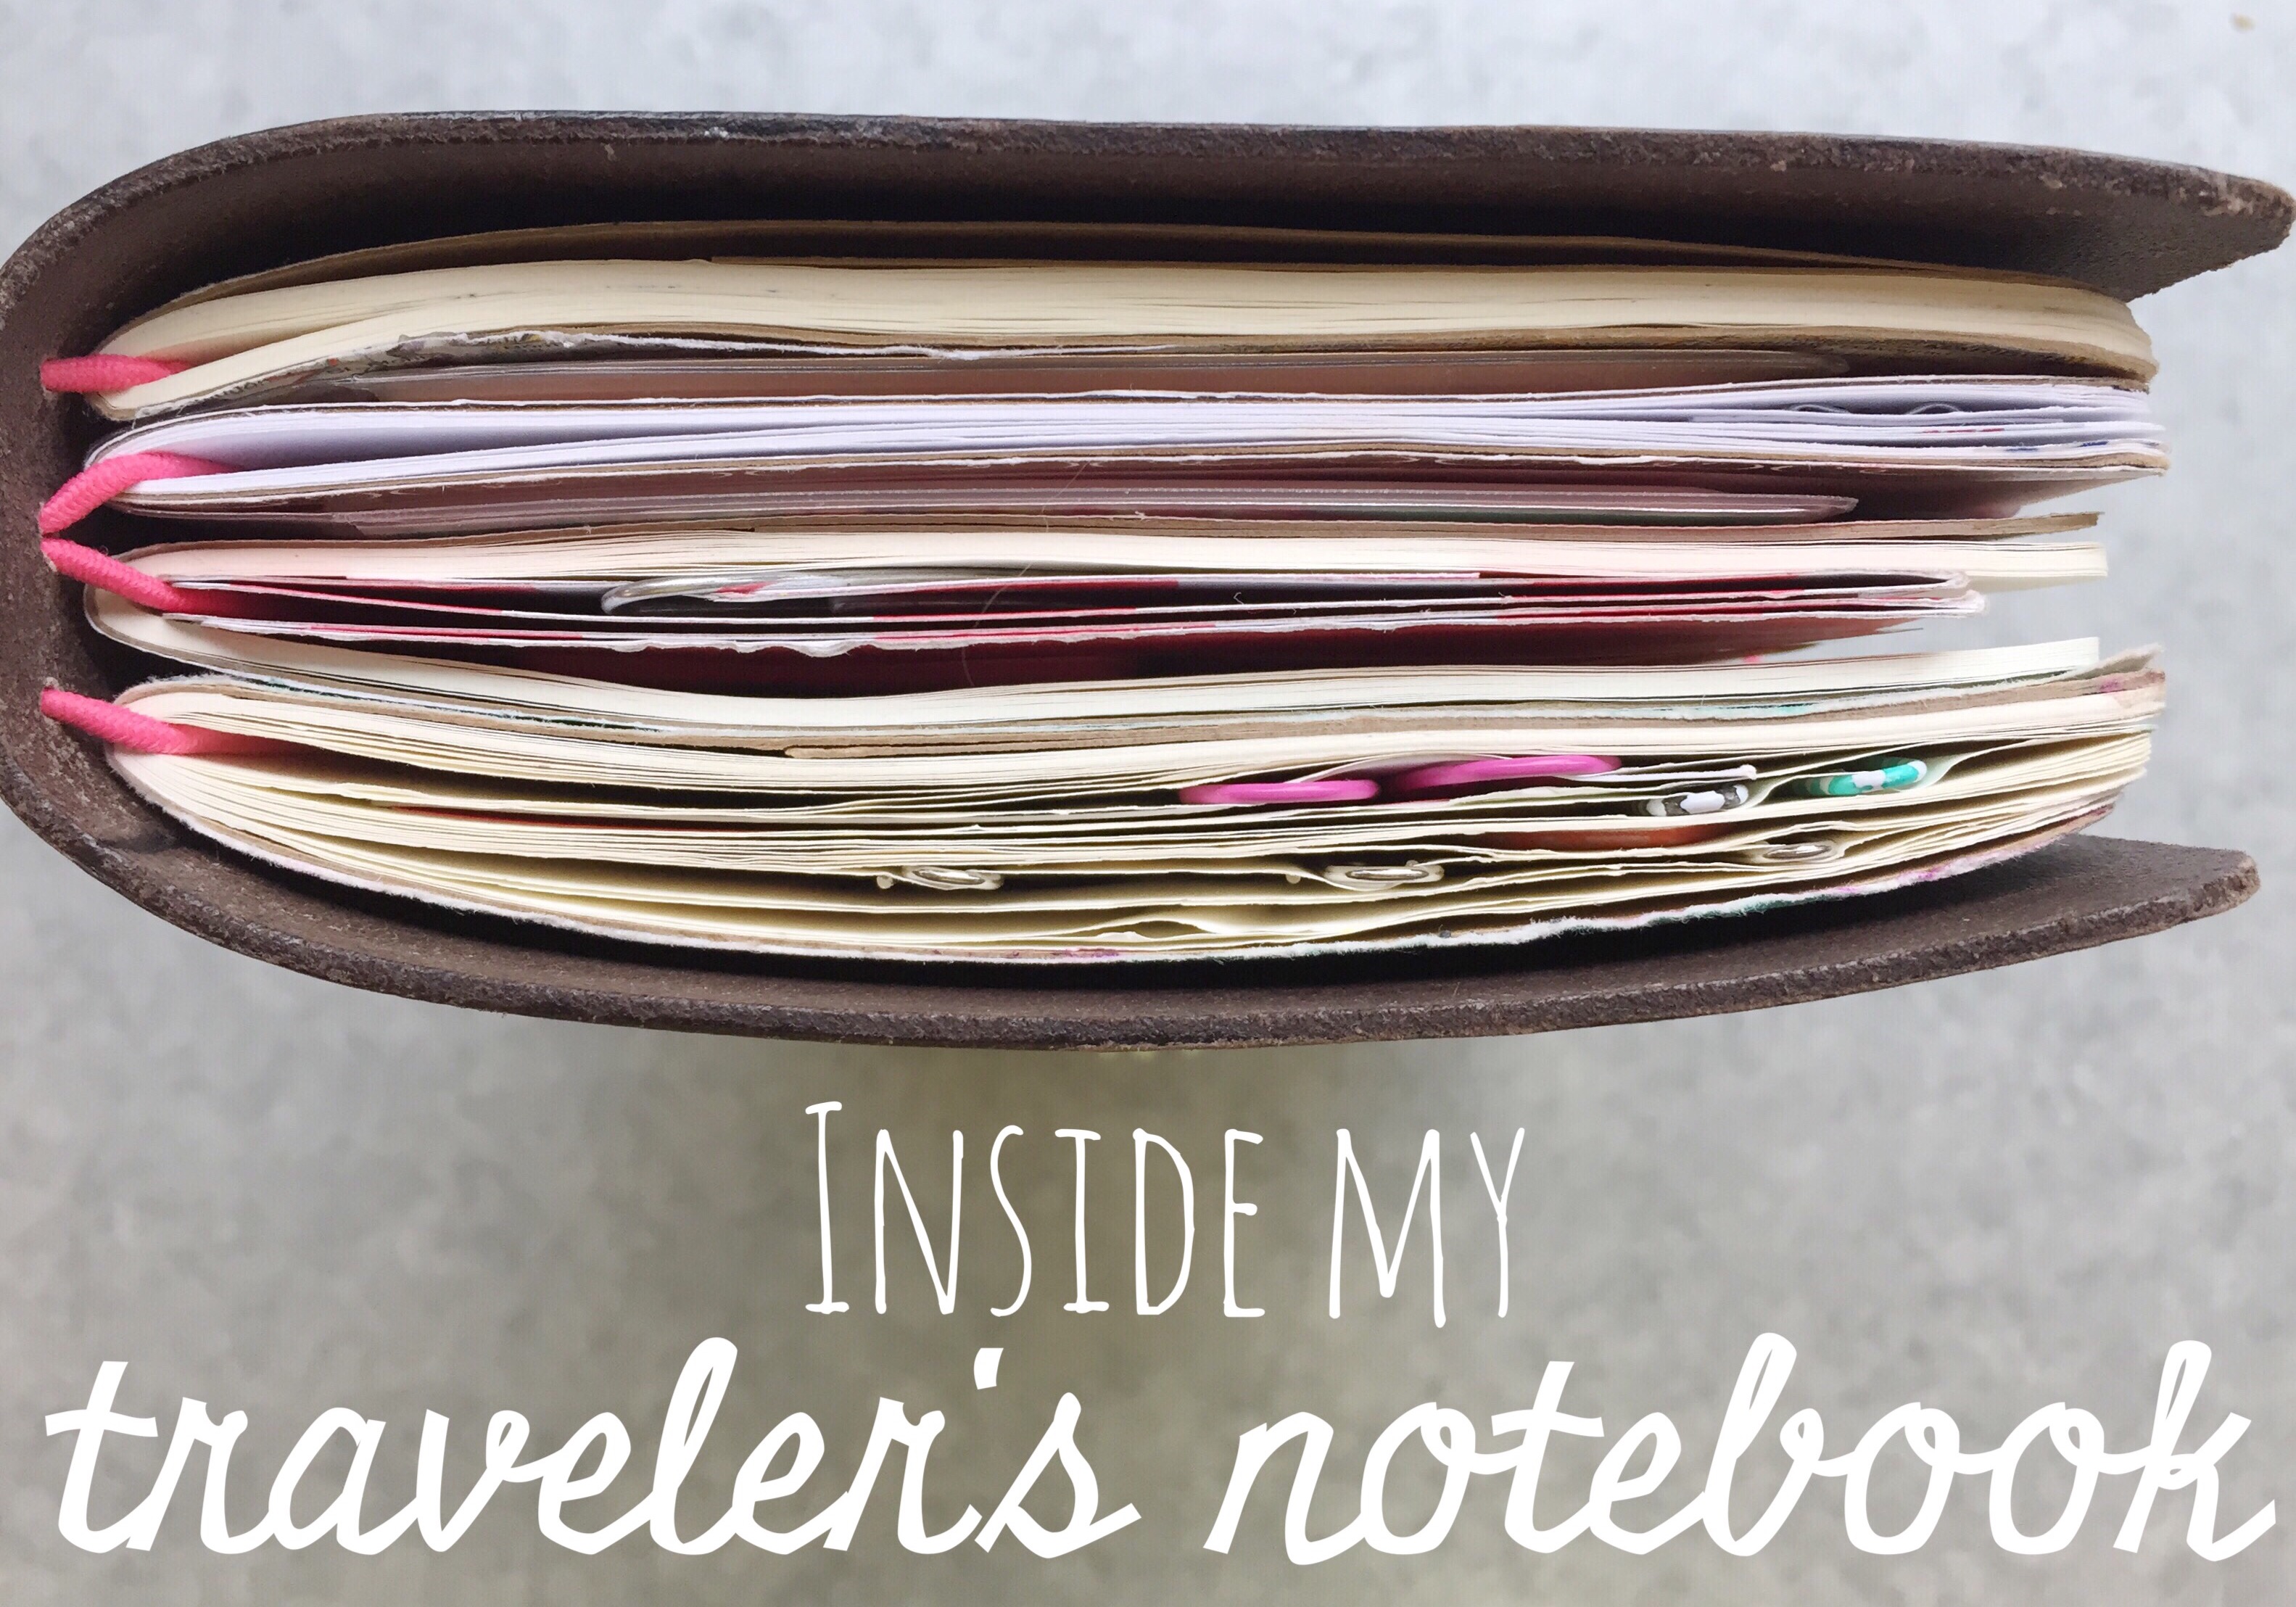
Today, I’m sharing a look inside my traveler’s notebook! If you haven’t heard of traveler’s notebooks before – beware – because when a dear friend of mine first told me about these addictive little devils six months ago, I had no idea what an obsession it would quickly become.

The most famous kind of traveler’s notebook originated in Japan and can be quite pricey, but as they’ve gained popularity in America, many small business owners have learned the craft and created beautiful pieces that are much more affordable and just as wonderful as the Midori (hence the names Pelle Dori, Faux Dori, Foxy Dori, etc.).

Traveler’s notebooks come in all different shapes and sizes and literally beg to be customized. In reality, it’s only a piece of leather and a few pieces of elastic string. Who would have thought that something so simple could be so wonderful?!

My traveler’s notebook is from an Etsy shop called “The Foxy Fix” (Foxy Dori) and the lady who makes them is incredible. She was so sweet to me, quickly responded to my emails, cleared up all questions I had about sizing, and I could just tell that she really puts her heart and soul into the craftsmanship behind the beautiful, handmade leather books.

At first, I was a little confused about sizing, because they kind of have weird names, but I knew I wanted a size that fits a Moleskine Cahier notebook because they’re a great size for journaling or list-making and can conveniently be picked up at Target in a pack of three. The size I have is called a “wide” with quad strands (meaning there are four strands of elastic inside for books) and a single strap (one elastic band holding it all together on the outside, compared to a double strap).

There are several colors of leather to choose from and the beauty of the imperfections really do make it your own. I chose “Tatonka” and pink elastic straps (“G” in the sample photo shown below).

il_570xN.756399180_jrk1

il_570xN.756538481_n1jv

Ok! Now that all the logistical parts of this little adventure are out of the way… let me show you my little treasure. Seriously… I have always been a planner snob, but I can’t say enough good things about this.

You can choose any kind of charm you’d like and I change mine out all the time, but right now I just have a mint tassel that I picked up at Michaels. The charms can easily be attached by simply untying the outer elastic strap (or some charms have little clasps).

IMG_2923

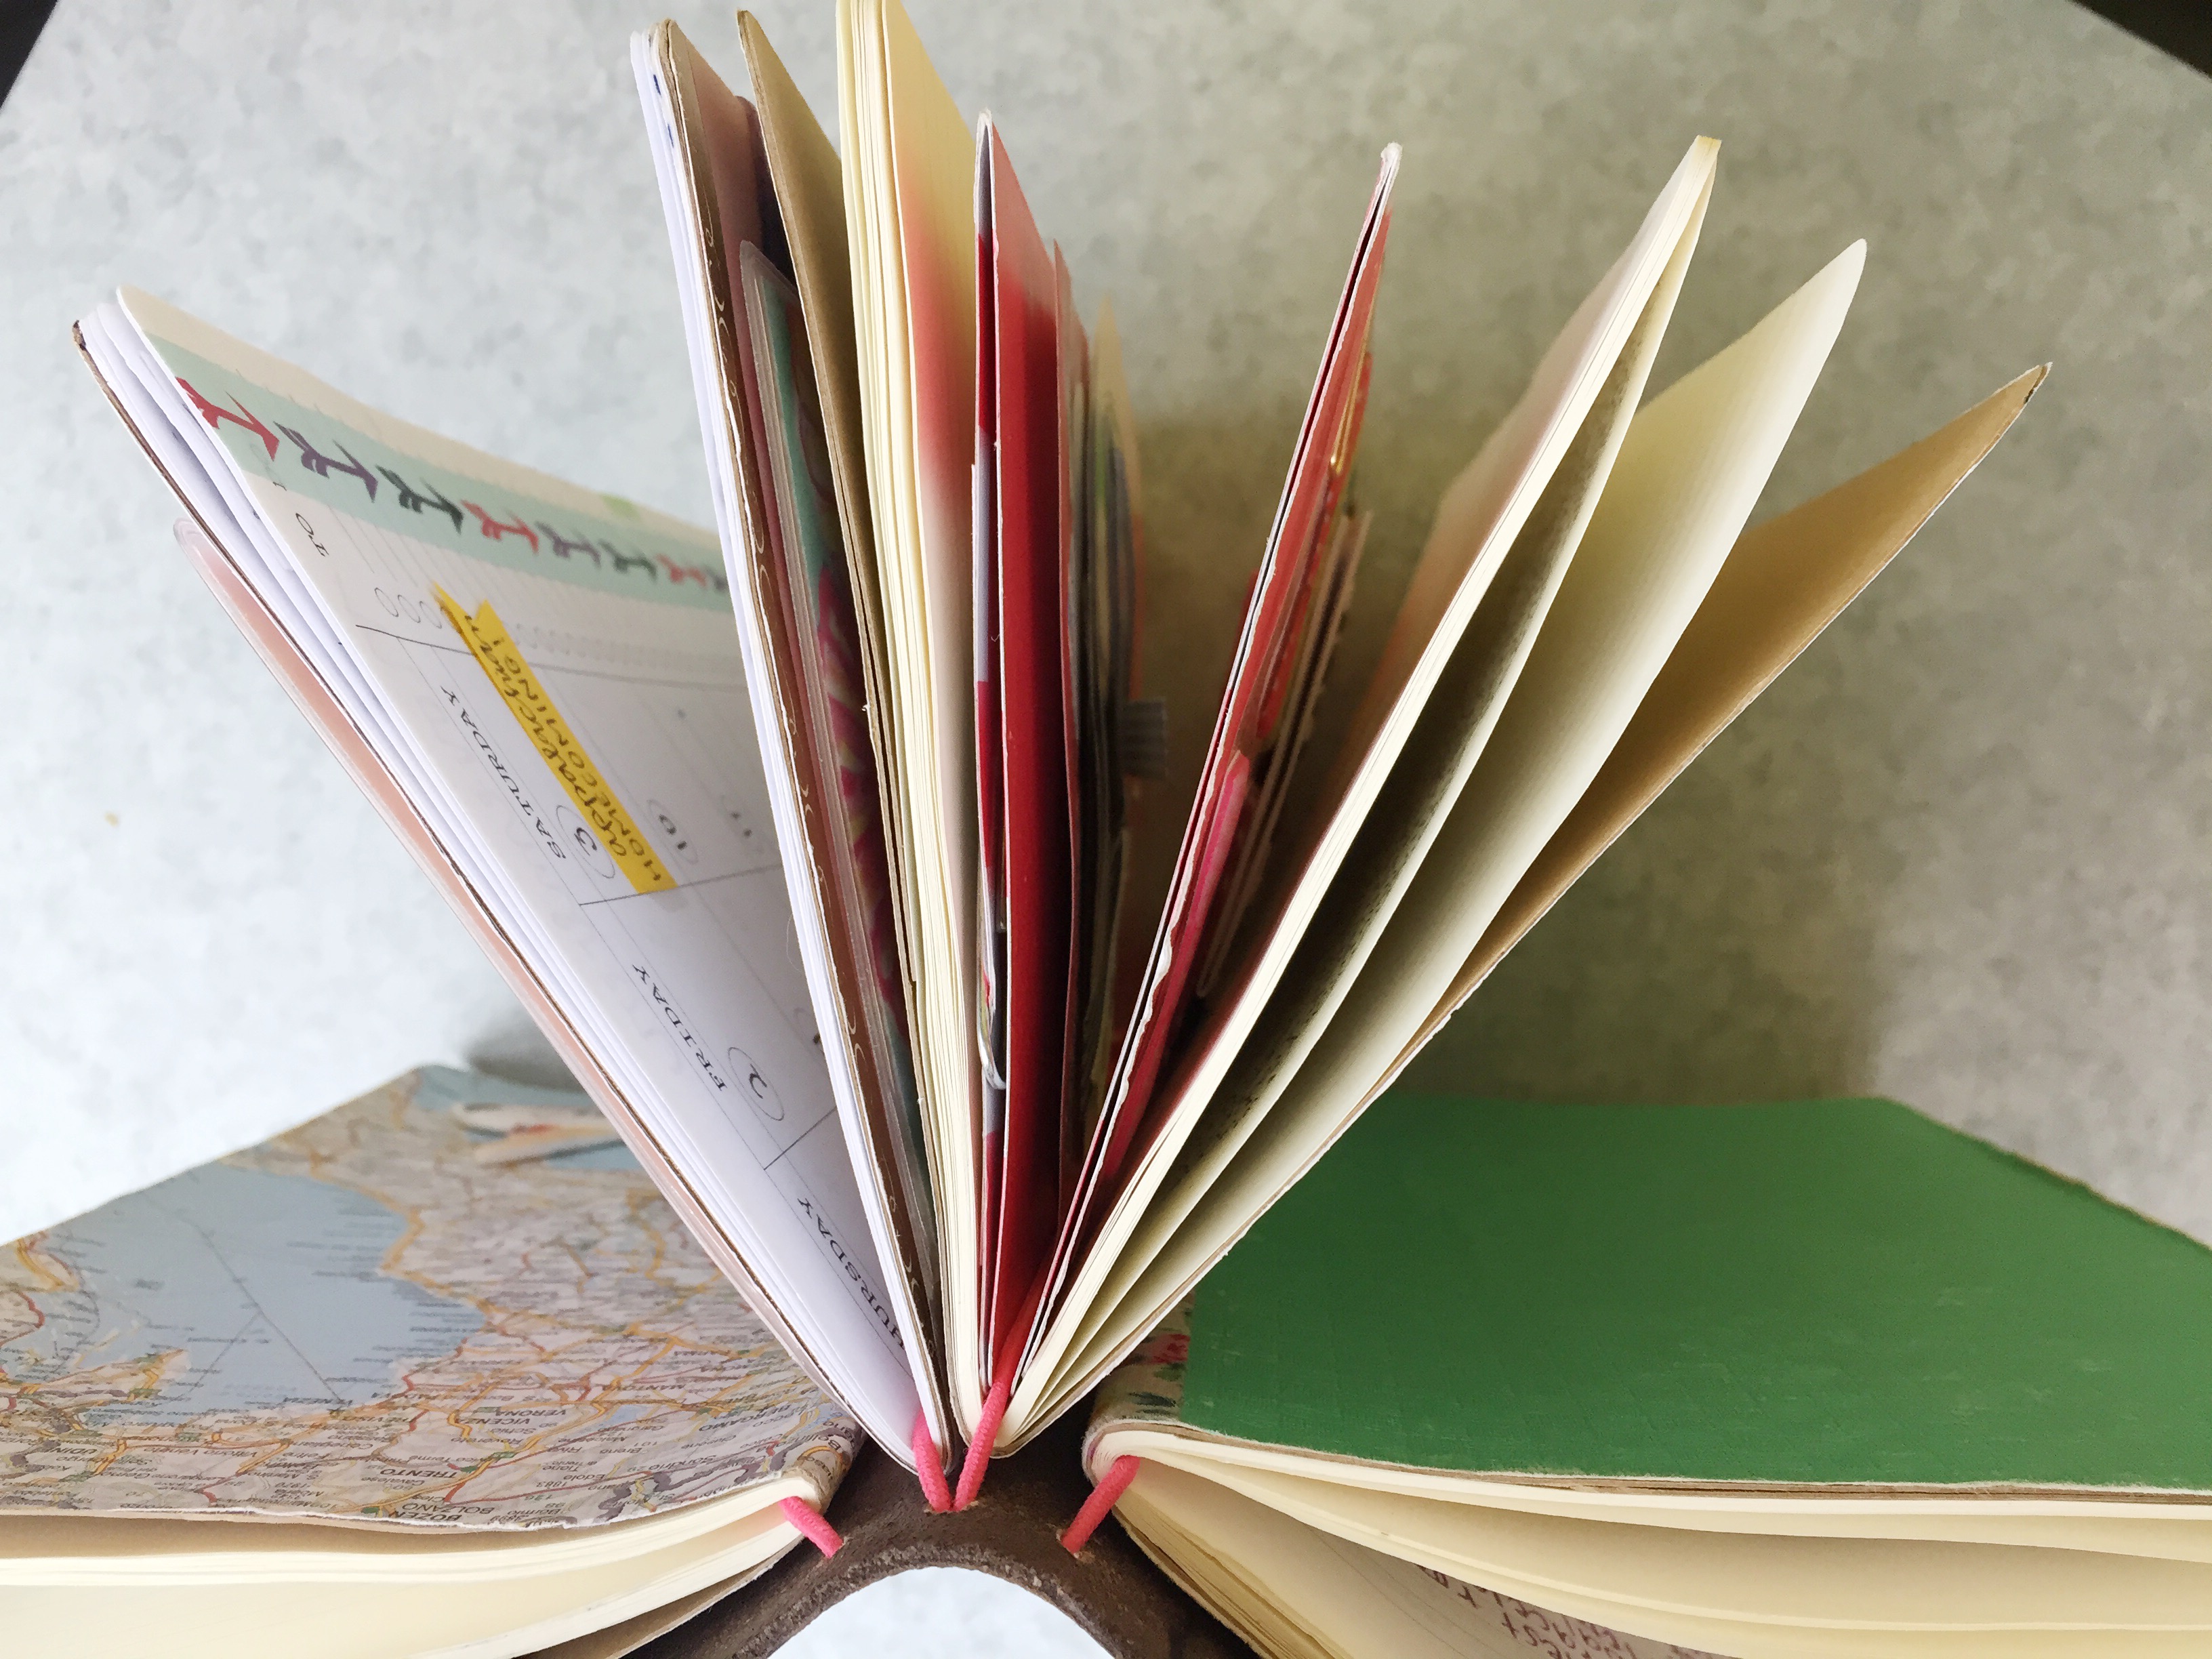
My favorite part about the traveler’s notebook is that it’s a convenient way to keep all my different books:

  • one for to-do-lists, grocery lists, and Renmen Abonde orders
  • one as my journal/prayer journal
  • one as a calendar
  • one to keep track of my pen pals/pocket letter pals

all in one place. They can easily be removed by slipping them off their strap, which comes in very handy when I want to take just one small book into the store with my grocery list instead of the whole thing.

IMG_2950

First, I have my book containing to-do-lists, grocery lists, and bracelet orders. It is a Moleskine Cahier notebook covered in a textured, teal wrapping paper with fabric washi tape on the binding. I cover the books by tracing them on the paper, cutting it out, and then using rubber cement to adhere the paper to the book.

IMG_2926

The inside of this crazy book (I like to think of it as organized chaos) looks a little something like this:IMG_2931IMG_2928

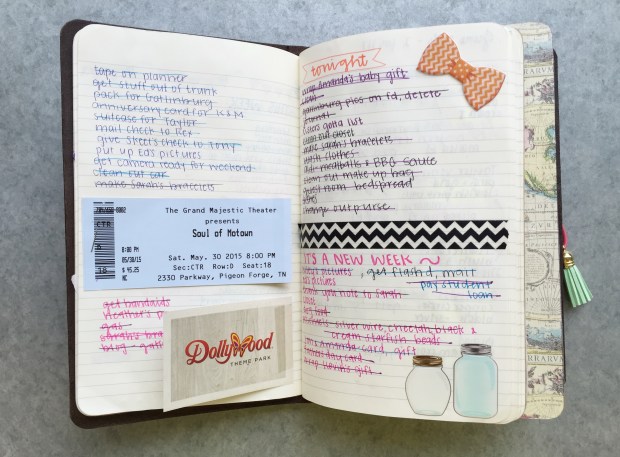
I also love to keep ticket stubs, little notes from friends, and cute stickers. Next, comes my journal/prayer journal. It’s also covered in wrapping paper.

If you used only Moleskine Cahier notebooks in a traveler’s notebook this size, you could fit eight books total inside by using a rubber band to connect two books together at the spine, having then two books per strand.

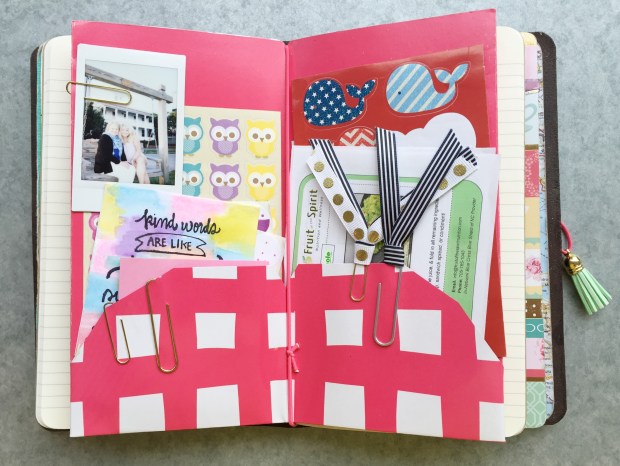
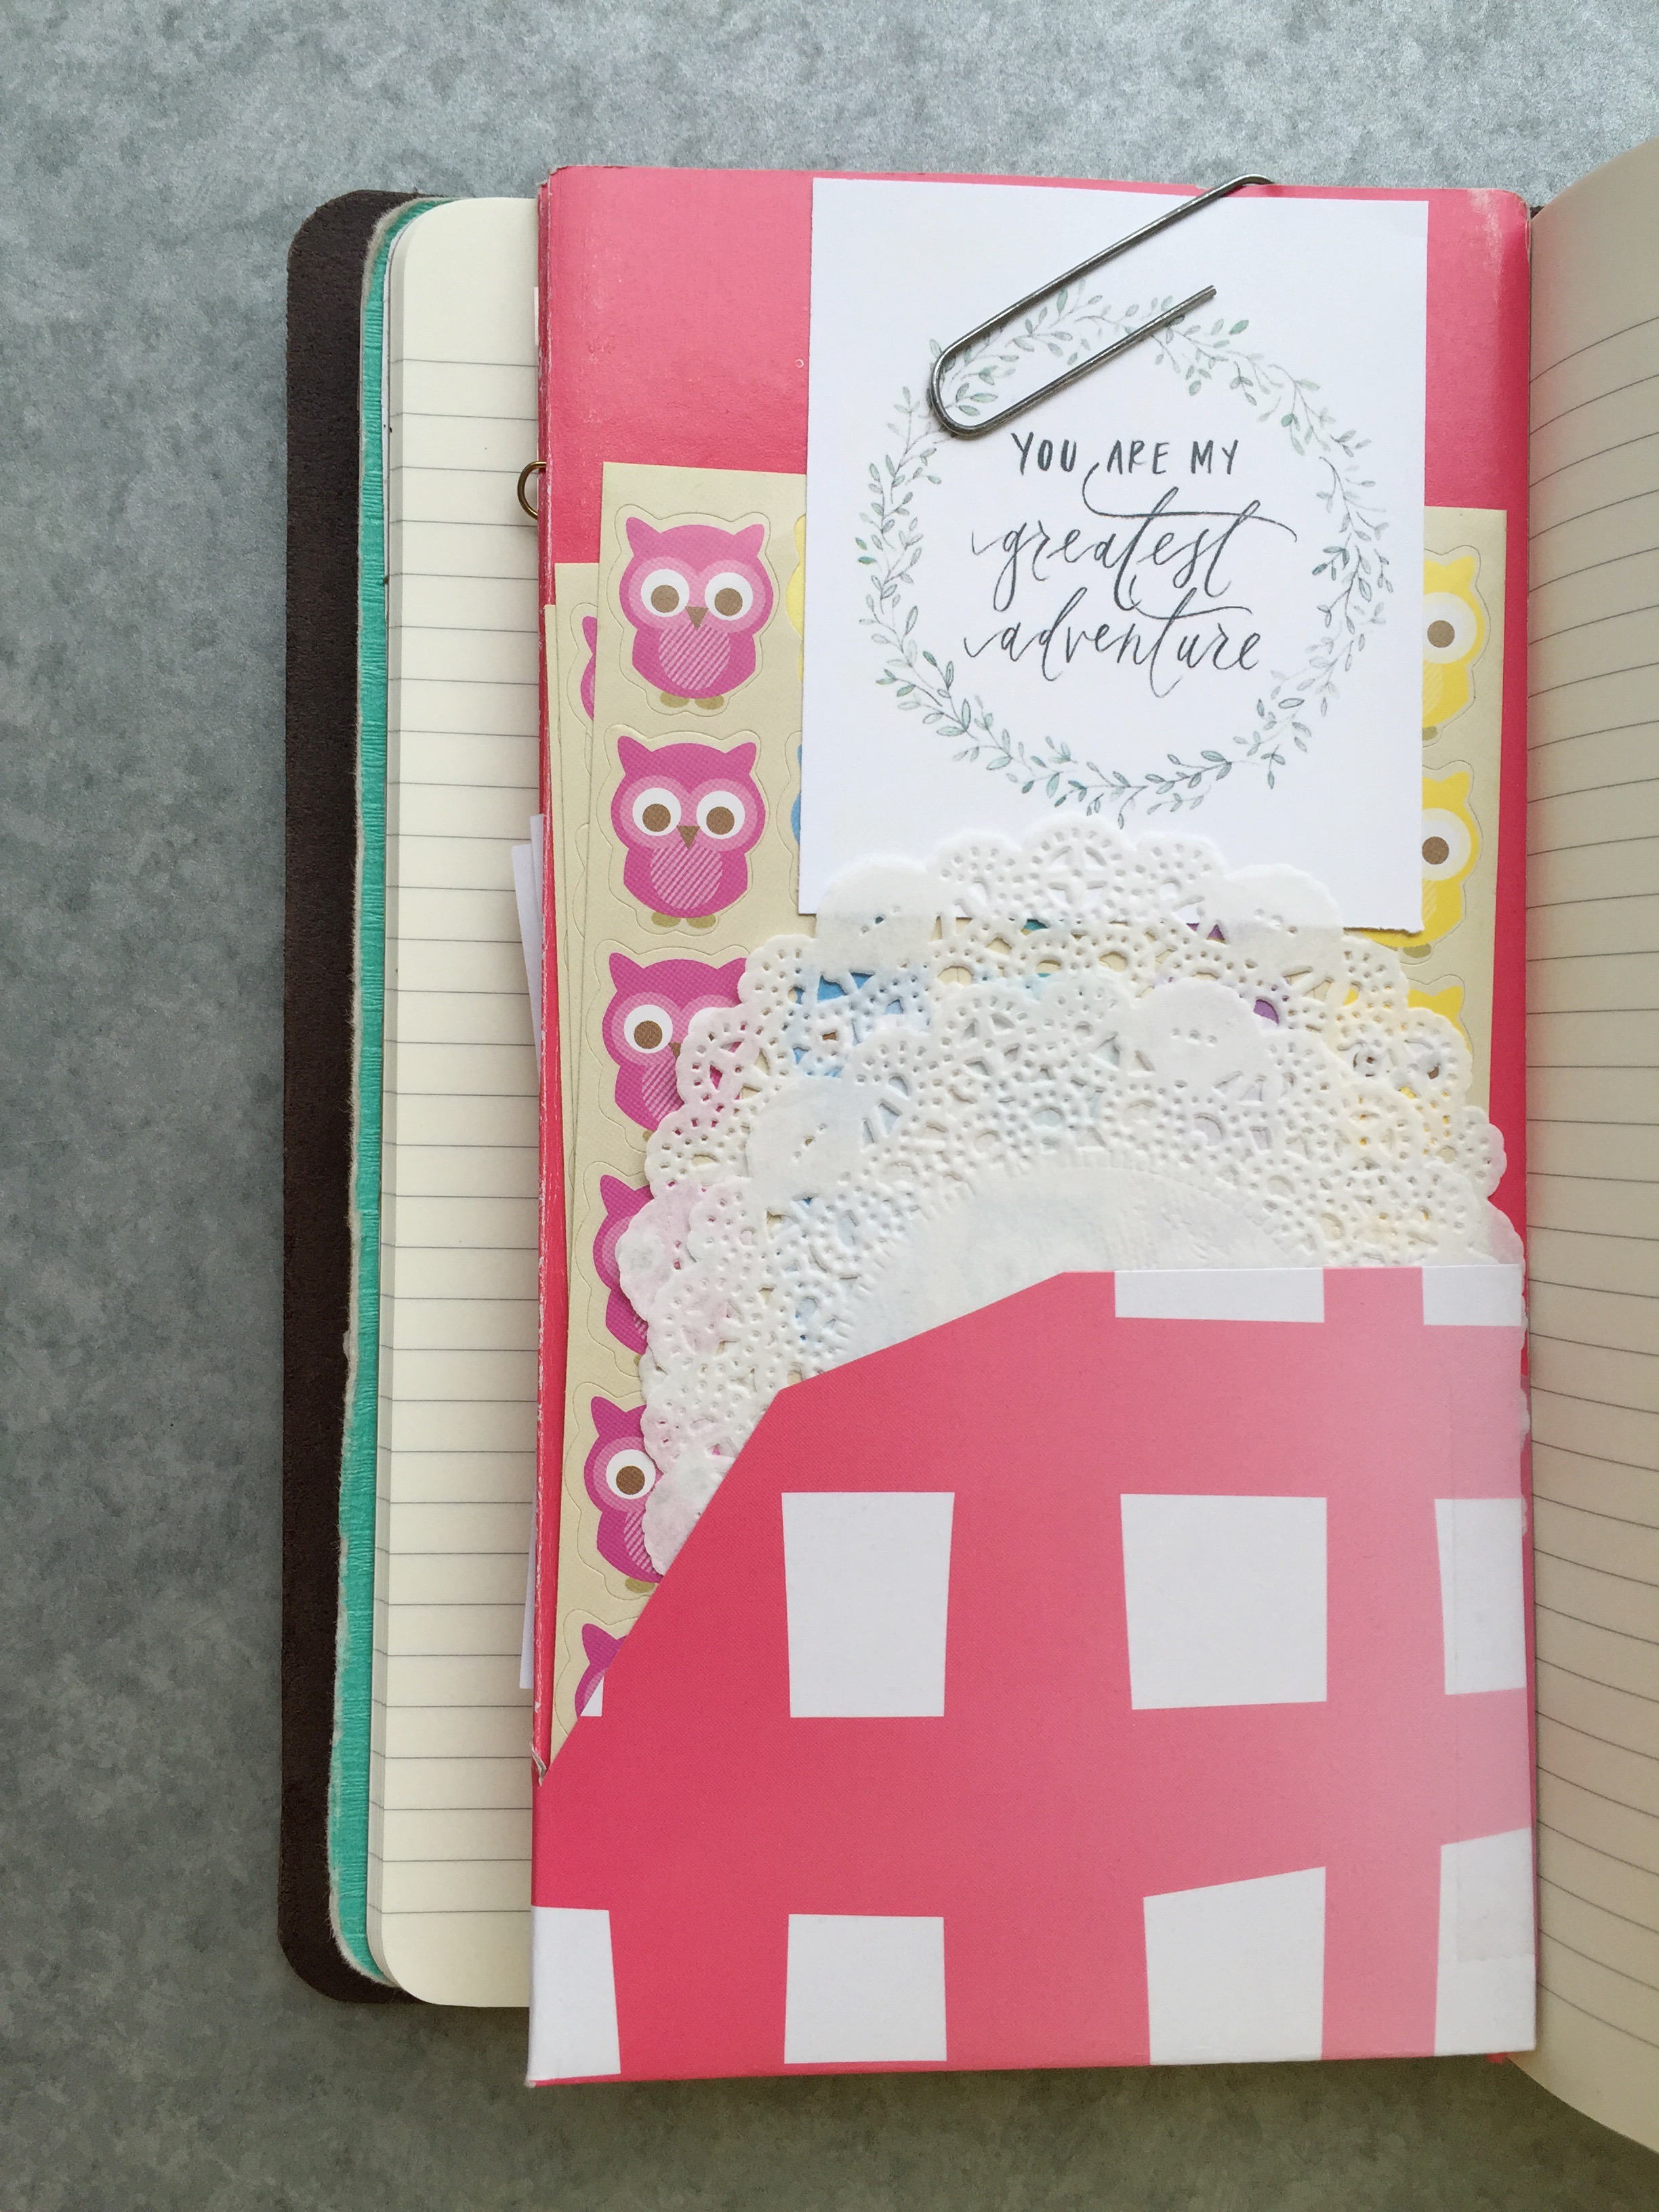
I, however, have two inserts in mine that share strands with a Moleskine Cahier notebook. First, I have this pocket organizer, made out of a file folder. The same dear friend of mine who introduced me to the traveler’s notebook made this for me. You can see a tutorial for something similar here.

I love this because it’s a place to keep stickers, washi tape, recipes, and all sorts of things that I use to decorate my planner. It fits inside of my journal on the same strand, so when I want to write in my journal I just slip it off the strand, leaving the pocket organizer in place.IMG_2949IMG_2936IMG_2937

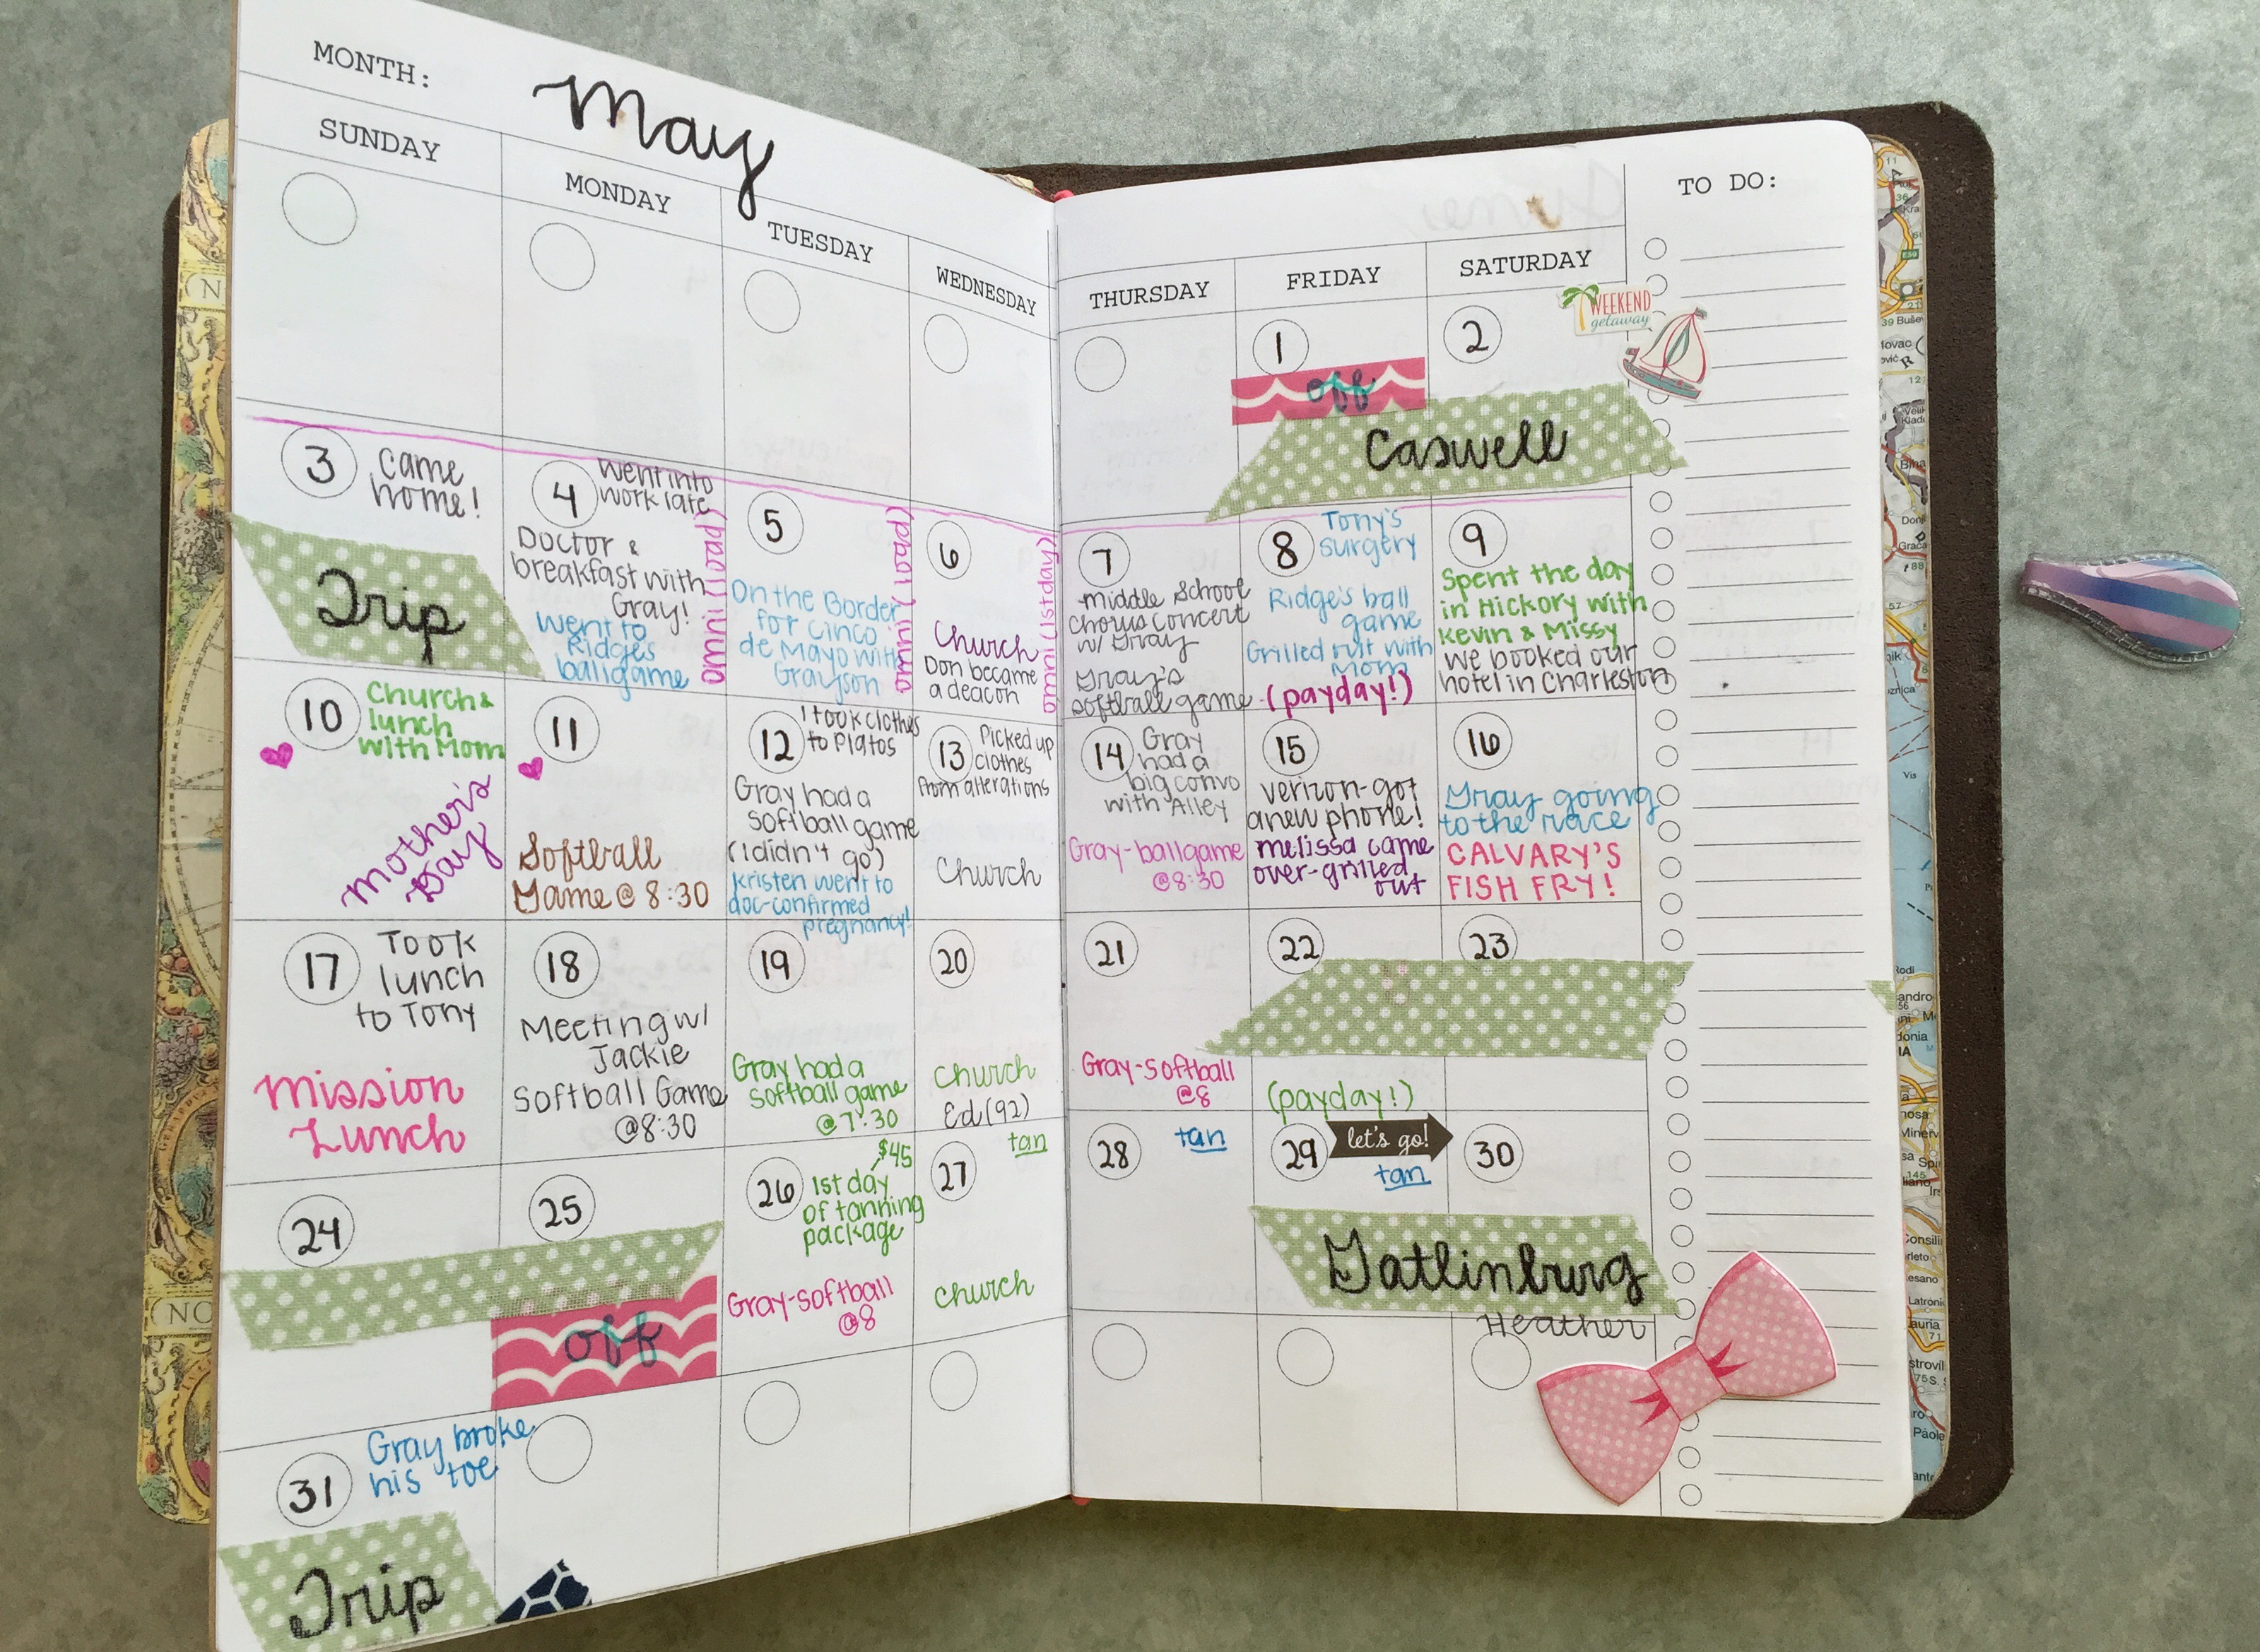
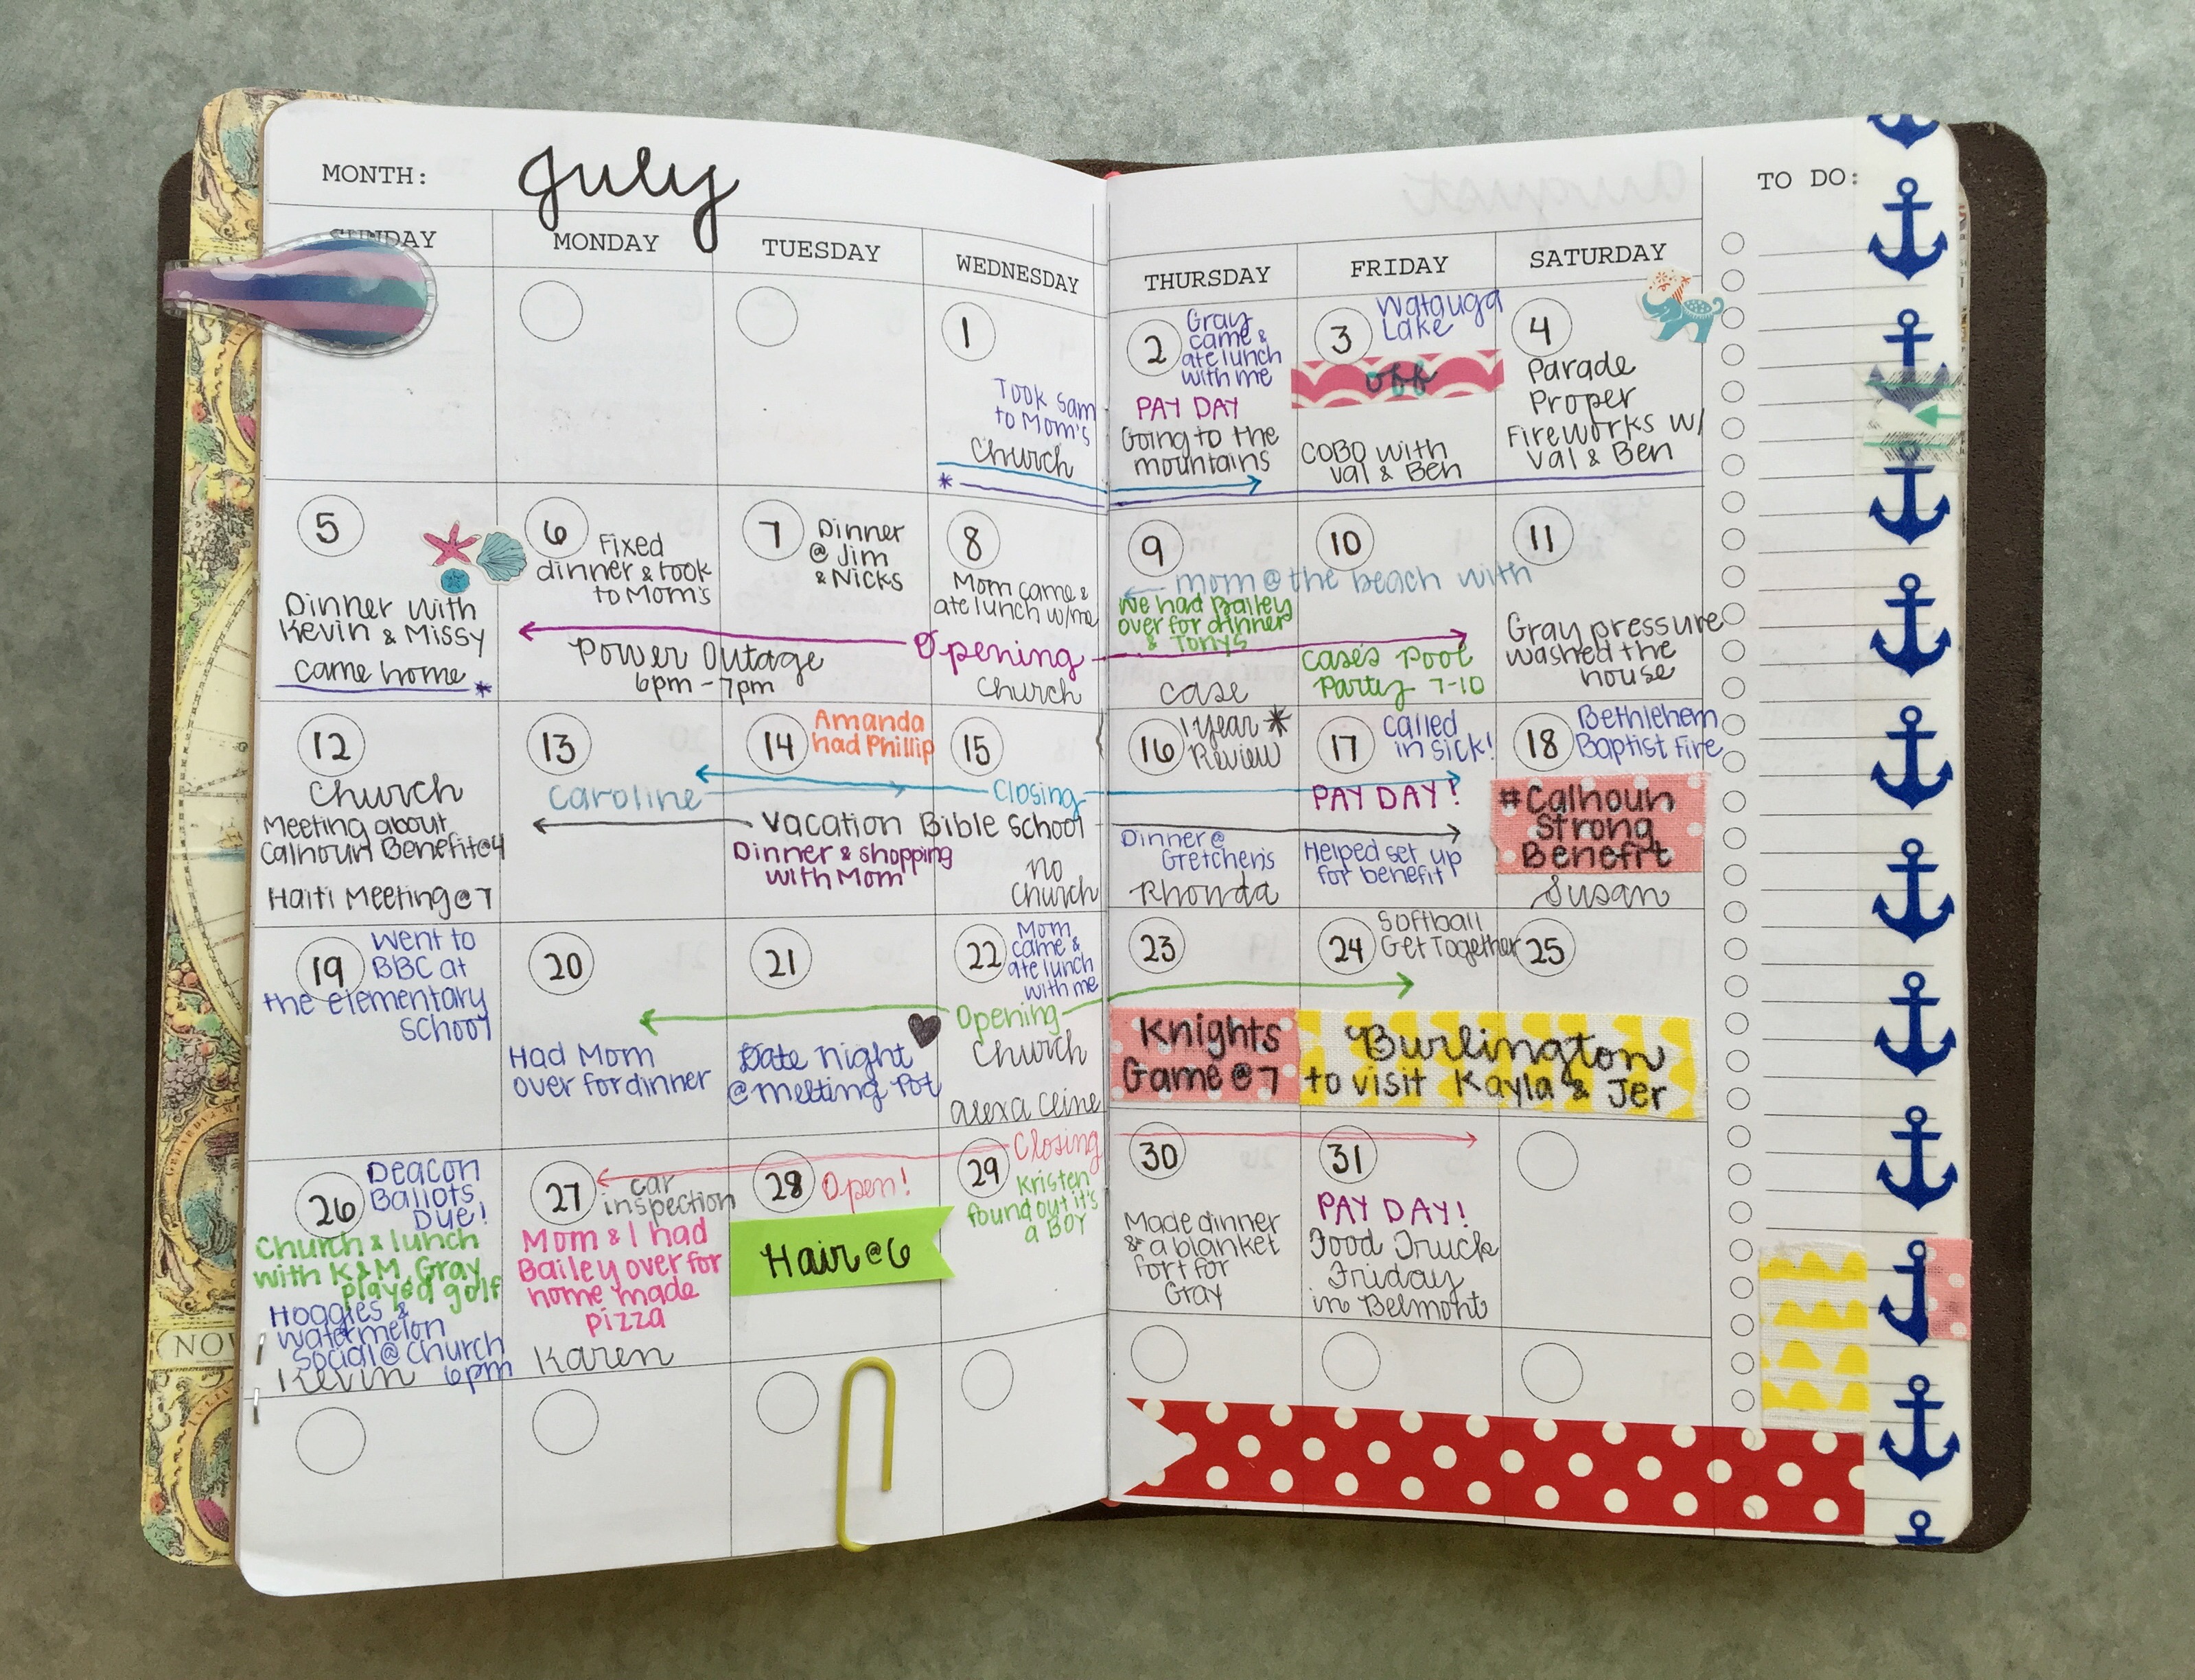
Next, on the third strand, I have a clear pocket organizer from the Goutlet Pen company, called a “card file” (regular size, $7.20 for 12 pockets) and my calendar (cahier size, $9 for 13 month calendar), which is from an Etsy shop called Yellow Paper House. Yellow Paper House is one of my favorite Etsy shops because there are a ton of different varieties of calendars and lots of options for page colors. I chose white pages because I like to color-code with pens and use washi tape to mark important dates.

I found cute patterns on Pinterest (and yes, most of them are Lilly Pulitzer), printed them off, and cut them to fit snuggly in the pockets of the card file. This makes it much easier to see what is in the pockets (compared to getting the front and back pockets confused because they’re see-through). In these pockets, I keep things like a snapshot from my polaroid, some strips of washi tape, business cards, stamps, and sticky notes. Like the file folder pocket organizer and my journal, the card file and planner share a strand.

IMG_2938

I covered my planner with scrapbook paper and when it arrived in the mail, the inside was completely blank. I labeled each month and day by hand with a felt-tip pen, and was able to totally and completely make it my own. The whole thing is like an empty canvas, just waiting for it’s owner to get creative. I love it!IMG_2942IMG_2943

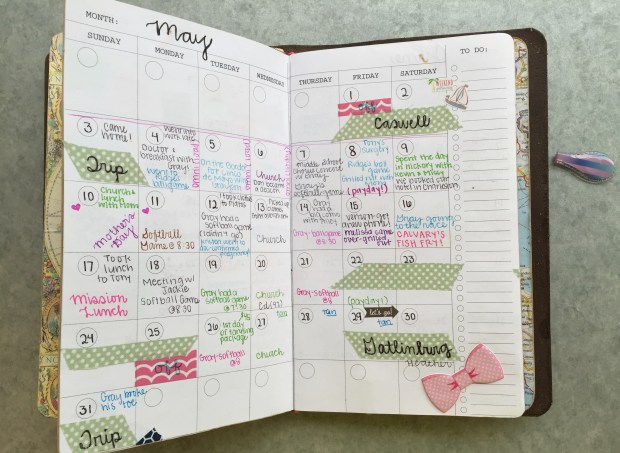
The last book in my traveler’s notebook is where I keep track of my pen pals and pocket letter pals (which is another topic for another day). I covered this Moleskine Cahier notebook in a real map, and attached a little airplane with super glue.

If you have any questions, please don’t hesitate to ask… I could seriously talk about this thing alllllll dayyyy longggg. Happy planning, girlfriends!

Zucchini Taco Boats

I was so pleasantly surprised by this recipe. These bad boys are GOOD (and knowing they’re a healthy alternative to tacos makes them even yummier!).

Ingredients:

  • 3 large zucchinis, cut in half lengthwise
  • 1/2 cup mild salsa
  • 1 lb. of lean ground turkey
  • 1 tsp. garlic powder
  • 1 tsp. cumin
  • 1 tsp. salt
  • 1 tsp. chili powder
  • 1 tsp. paprika
  • 1/2 tsp. oregano
  • 1/2 small onion, finely chopped
  • 3 tbsp chopped bell peppers
  • 4 oz. can tomato sauce
  • 1/4 cup water
  • 1 cup shredded cheese

Directions:

  • First, preheat the oven to 400 degrees and cover the bottom of a 9×13 baking dish with the 1/2 cup salsa.
  • After cutting the zucchini in half lengthwise, use a spoon or melon baller (if you’re super fancy) to hollow them out, leaving about 1/4 inch so they keep their shape.
  • Chop some of the zucchini filling and squeeze excess water with a paper towel. You should have 3/4 cup, which you’ll add to the cooked turkey meat. You can just discard the rest of the zucchini filling, or save it to use for another recipe!
  • Drop the zucchini halves into salted boiling water for one minute, then place in the baking dish on top of the salsa.
  • In a large skillet, brown the turkey, breaking it up as it cooks. When it is no longer pink, add your onions, peppers, water, tomato paste, 3/4 cup zucchini filling, and spices. Let simmer for about 15 minutes.
  • Using a spoon, fill the hollowed zucchini boats and top with cheese.
  • Cover with foil and bake for 35 minutes.

IMG_2665

  • Serve immediately. I recommend topping with sour cream and chopped scallions or cilantro.

What do I love most about zucchini boats? They are so easy to change up for a totally different taste. You can find two other zucchini boat recipes I’m just dying to try here and here.

Mini Omelette Muffins

I made these little cuties for the first time this past weekend for our monthly women’s brunch at church, and was so pleased with how they turned out. They could easily be prepared the night before.

Ingredients:

  • Cooked, crumbled bacon
  • Shredded cheese
  • Diced peppers
  • Diced onions
  • Anything else you like in your omelettes: sausage, mushrooms, spinach, ham, tomatoes, etc.
  • 11 eggs
  • Salsa as a topping (optional)

Instructions:

  • Preheat oven to 350 degrees
  • Cook bacon (or whatever meat you choose)
  • Spray cups of muffin pan (I used cupcake liners and regretted it because the muffins stuck to the paper)
  • After dicing your peppers, onions, mushrooms, cheese, or whatever mix-ins you choose, add them to the meat and distribute into the cups of your muffin pan
  • Crack 11 (large) eggs and mix well in a bowl with salt and pepper
  • Pour eggs over the mix-ins in each cup so that they are a little over half-way full
  • Bake for 18-20 minutes and serve immediately

IMG_2209

Sweet as Southern Peaches + Sunday

This Sunday was the dreamiest. We made a little road trip to meet my great aunt and uncle at Fishers Peach Orchard near Greer, S.C. to pick the juiciest, most beautiful peaches. They were just hanging in big clusters and the light peeking through the trees in the orchard was breathtaking. I think we’ve found ourselves a new late-summer tradition!

11222521_10207271788658650_8607901726580398384_n 11265243_10207271787738627_5610710903053319410_n 11698585_10207271789858680_7349919657215220144_n 11822348_10207271788778653_9011138328869424438_n